
 Today's DAR
When walking through a room, few of us think about the floor unless it develops structural or cosmetic problems. Since its installation in 1999, the O’Byrne Gallery floor had seen better days . The old floor consisted of straight cut white oak, stained and veneered over plywood, commonly called laminate flooring. Its dark stain had faded in spots and was scratched and chipped and some of the individual pieces loosened from the concrete subfloor. Needless to say, time had come to think about replacement.

The New O'Byrne Gallery Floor


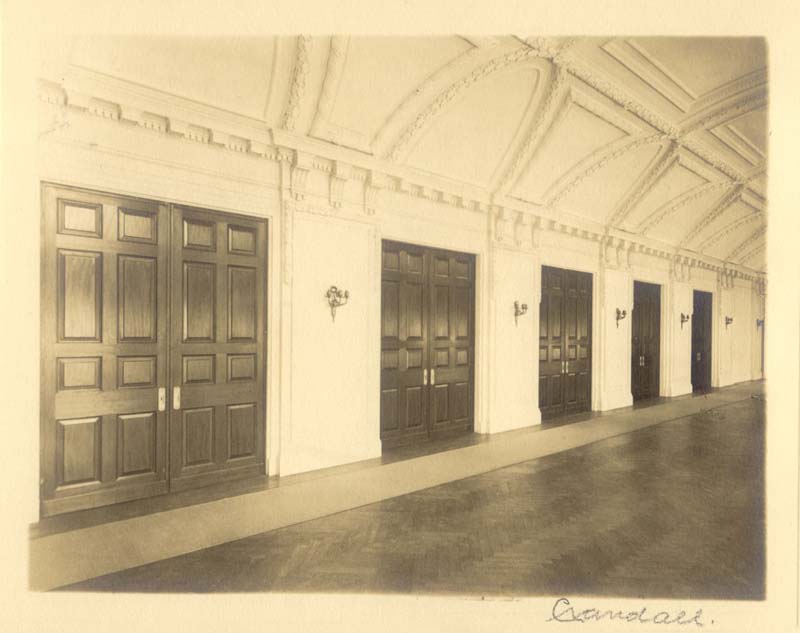
To figure out what the new floor should be I had to do some research to determine what the original 1911 floor looked like. The best place to find out original details in Memorial Continental Hall is in the original specifications book written by architect Edward Pierce Casey preserved in the NSDAR Archives. This book told contractors how the building was to be constructed. Casey specified that the “best American white oak, quartered…selected and kiln-dried” should be used and laid in a herringbone pattern. He further elaborated that individual pieces should measure three inches wide by eighteen inches long and a nine inch wide plain border would run along the perimeter of the room framing the pattern. This picture of the room when new in 1911 shows the original floor.

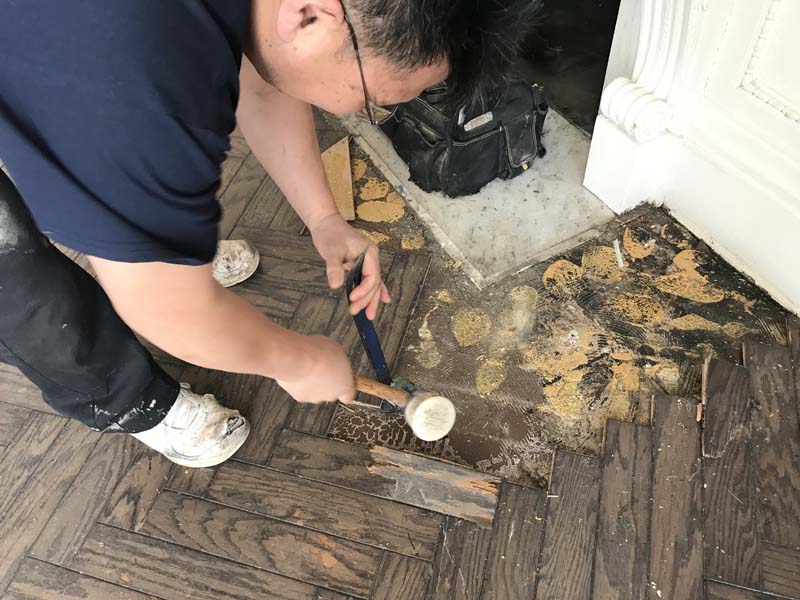
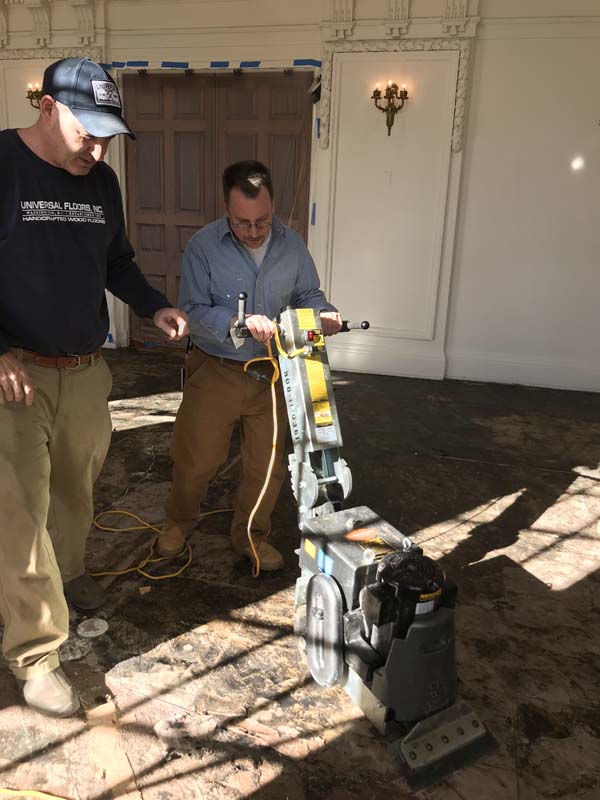
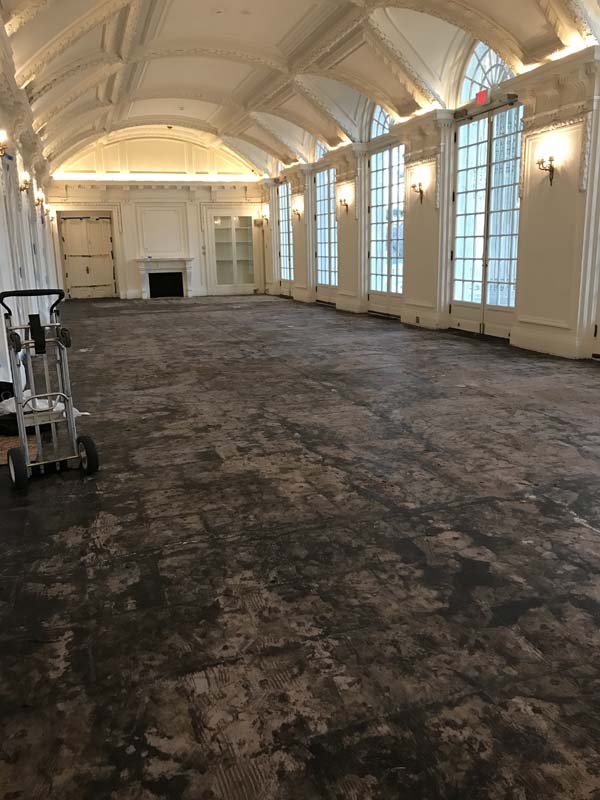
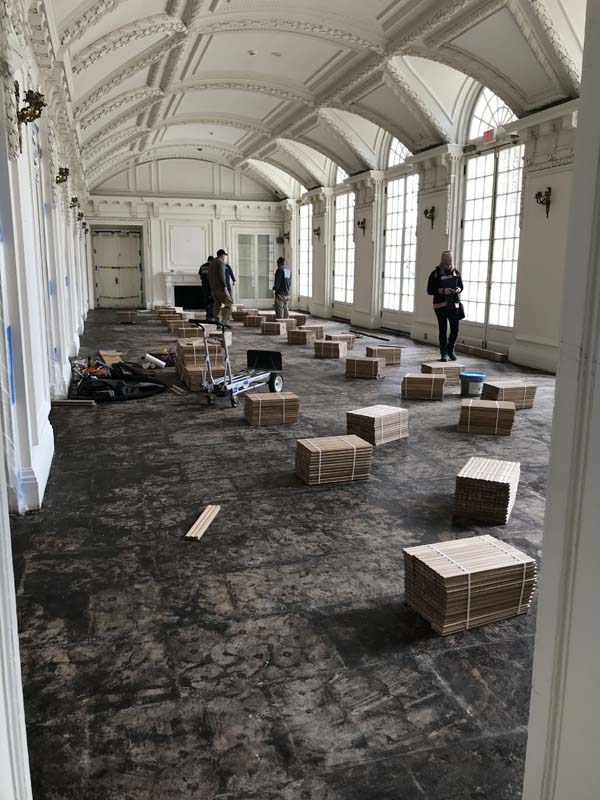
Historic preservation standards require new floors follow the original specifications as closely as possible or if specifications are not available, the floor materials and installation should replicate what was originally present in the structure. So the replacement floor would be American white oak, quartered and rift sawn. Universal Floors a local company that has installed similar floors in other historic buildings, did the work, but first the old floor had to be removed. Demolition of the old floor took a few days. Each piece had to be pried loose by hand using a crowbar or a special machine that could quickly remove the old laminate flooring. Yours’s truly even tried his hand at demolition, most gratifying! This photo shows the floor after demolition; the concrete subfloor is from the 1950s after the original flooring was removed to make way for tile. We chose to leave the concrete since it would create a lot of noise and dust to remove it and make the project much more complex and lengthy, and it is in fine condition.

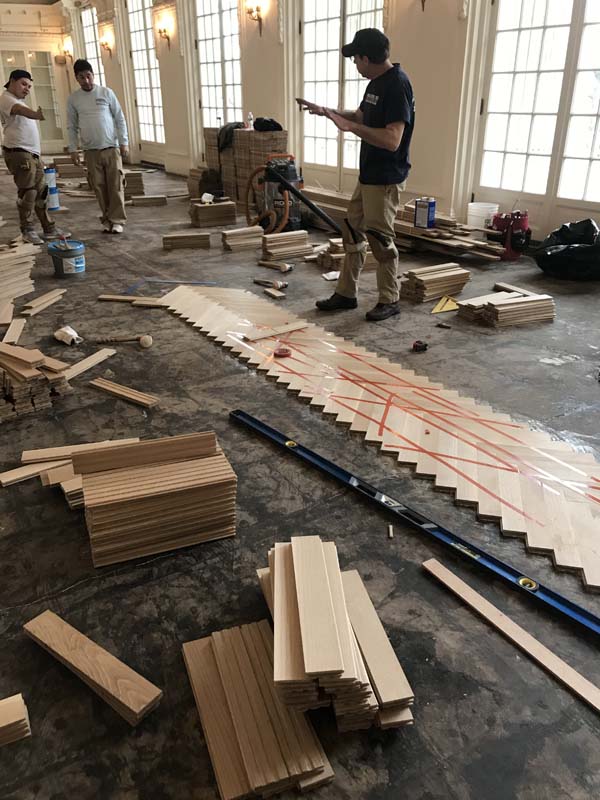
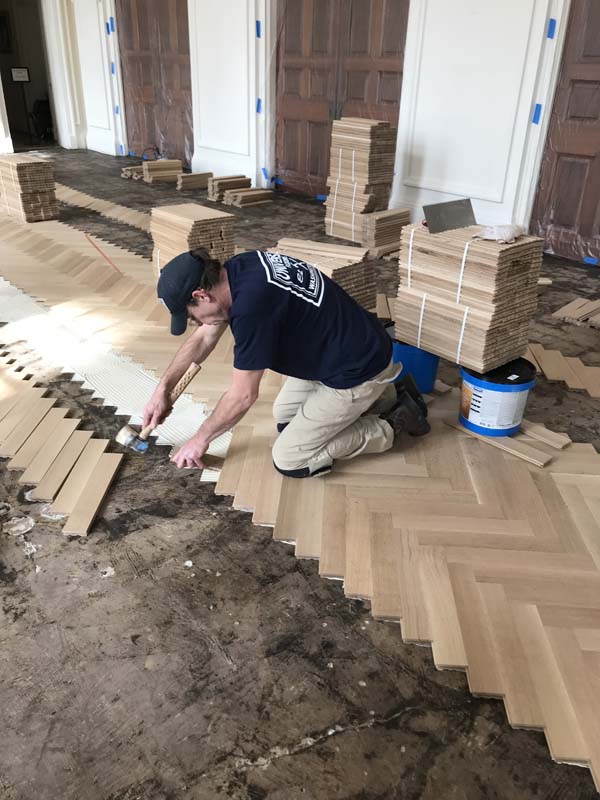
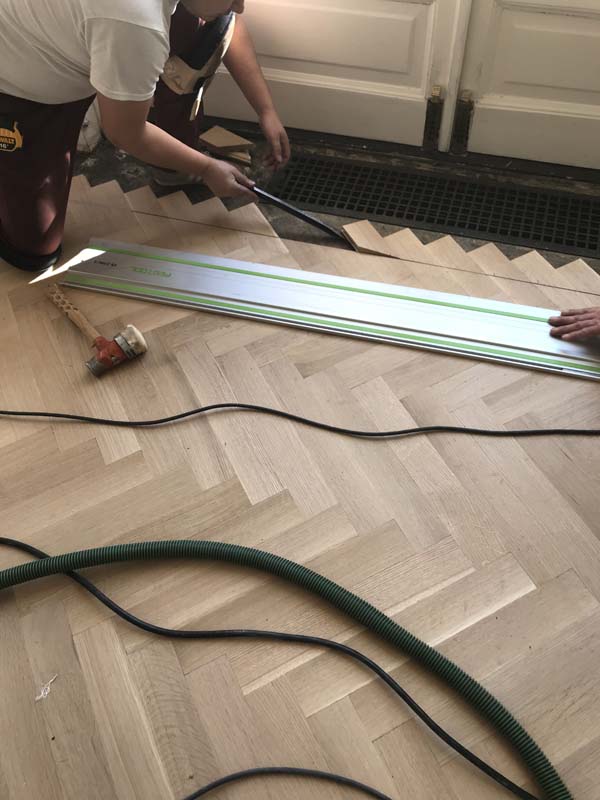
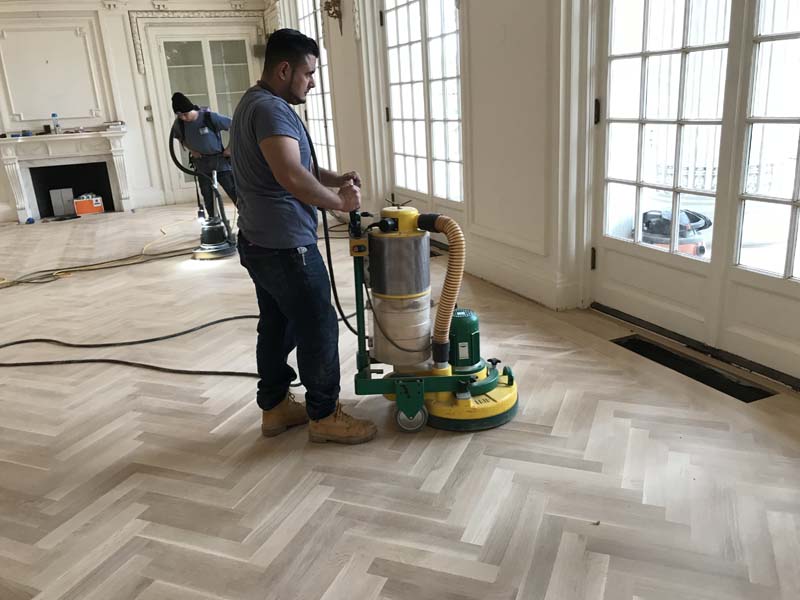
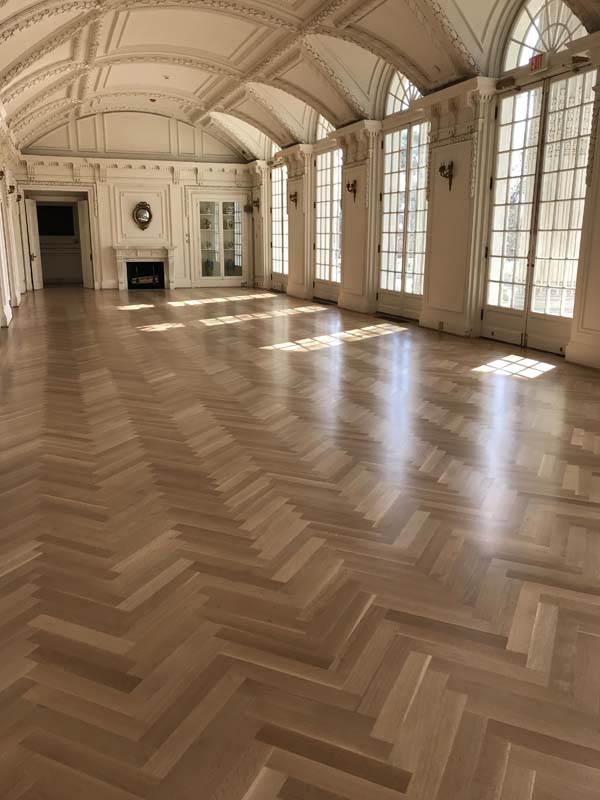
The new wood floor pieces arrived in bundles. Installation began in the middle of the room with the axis of the herringbone pattern centered on the fireplace. Getting the first course absolutely straight was critical otherwise the entire pattern would appear crooked. Individual pieces were carefully chosen to ensure an even graining pattern which produces the optical illusion that you see when you view the floor from different angles. After the center courses were complete, installation progressed quickly. The pieces were secured with glue and carefully tapped into place with a mallet. Installing the border required special preparation and trimming before laying the border in place. When installation was complete, the new floor was sanded then three coats of finish were applied and allowed to dry between coats. It took about two months to complete the new floor, but it was worth the wait because it is stunning. We would like to thank the Florida State Society for funding this important project.